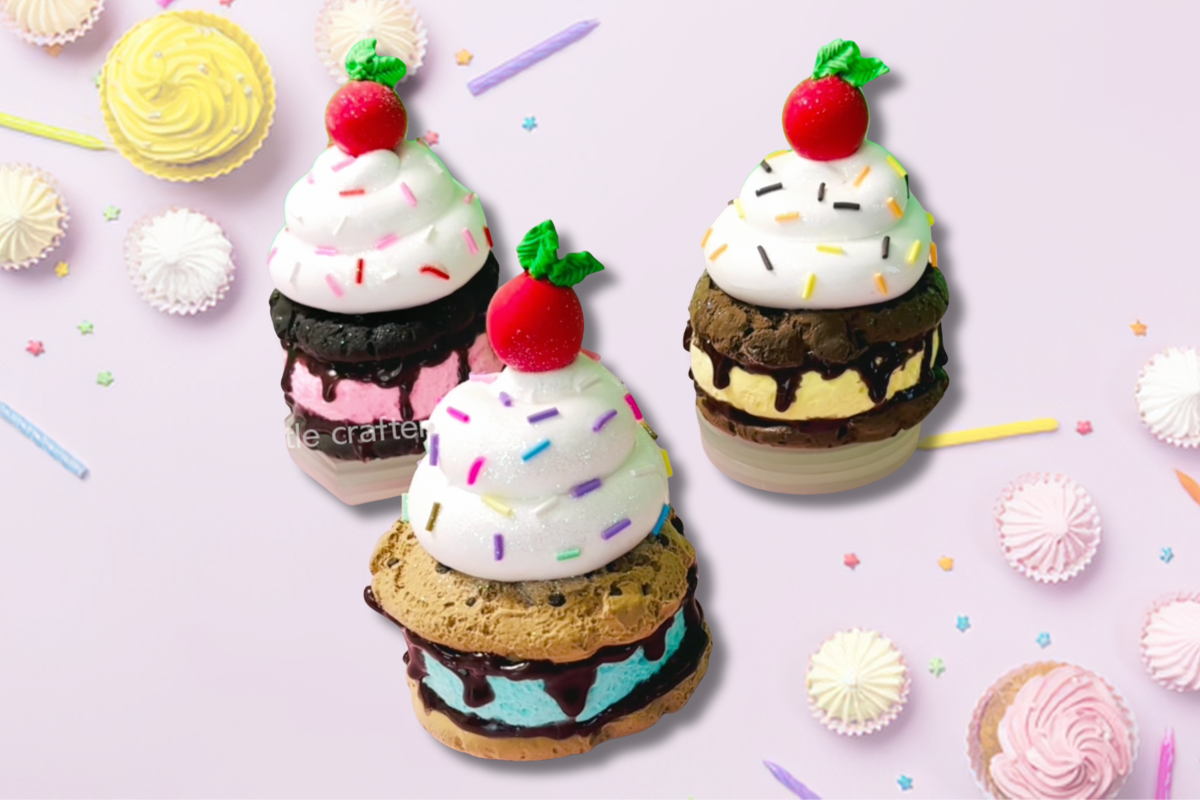
DIY Fake Ice Cream Sandwich Ornament (Chocolate Drizzle Faux Dessert Craft)
Watch the full tutorial above, then scroll down for the supplies and step-by-step instructions to create a DIY faux ice cream ornament using air dry foam clay. This cute faux dessert craft is perfect for tiered trays, home decor, and handmade gifts.
In this tutorial, you’ll learn how to make a DIY faux ice cream ornament using air dry foam clay and silicone molds. This beginner-friendly faux dessert craft is perfect for creating cute decorative pieces that look like real sweets.
If you love this project, explore more faux dessert crafts and fake bake ideas for even more cute DIY inspiration. Or you may love this faux cupcake tutorial!
Air dry foam clay is lightweight, easy to shape, and dries without baking, making it perfect for decorative crafts and ornaments.
Why you’ll love this DIY:
- Creates realistic faux ice cream details using molds
- Perfect for kawaii-style and fake dessert decor
- Lightweight design ideal for ornaments or display pieces
- Great way to use sprinkles and embellishments creatively
- Fun project for customizing colors and themes
- Works for year-round decor, not just seasonal crafts
This post may contain affiliate links. If you purchase through these links, I may earn a small commission at no extra cost to you. This helps support free craft tutorials like this one.
Supplies Used In This Craft:
- Air Dry Foam Clay
- More Air Dry Foam Clay
- Cookie mold (similar styles available on Etsy, Temu, or Shein)
- Mold used for the “ice cream”
- Holly Mold
- Crafting Sprinkles
- Toothpicks
- Glue Gun
- Glue Sticks
- Clear Glue
- Fine Glitter
How to Make a Faux Ice Cream Cookie Sandwich Ornament
- Prepare your workspace and gather all supplies.
- Take small pieces of brown air dry foam clay and shape them into small “chips.” Place them into your cookie mold.
- Press your cookie-colored air dry foam clay into the cookie mold, filling it completely.
- Carefully release the cookie from the mold and set aside.
- To create the ice cream center, press air dry foam clay (color of your choice) into the cake like mold and gently release.
- Create a second cookie using the same technique as above.
- Assemble your sandwich by layering cookie, ice cream, and cookie, securing everything together with clear glue.
- Using a colored glue stick in your glue gun, create a “chocolate drip” effect around the edge where the cookie meets the ice cream.
- Roll out additional air dry foam clay into a thick rope and form a swirl for the top.
- Apply clear glue to the top and attach the swirl.
- Create decorative embellishments for the top using molds or by hand shaping the clay.
- Insert the decorations into the swirl using a toothpick, adding a small amount of glue for extra hold if needed.
- Apply a layer of clear glue over the swirl, then add craft sprinkles.
- Finish by adding fine glitter for extra sparkle.
- Allow the entire piece to fully dry (24–48 hours) before handling or displaying.
Product Highlights From This Video

Decorative Pieces Silicone Molds
Perfect for creating realistic faux dessert crafts.

Air Dry Foam Clay
Soft, lightweight clay that dries naturally and is ideal for shaping cookies, ice cream, and decorative elements.

Craft Sprinkles
Add texture and a realistic dessert look to your faux treats with colorful sprinkles.
Looking for more supplies I use? Check out my favorite craft tools and materials here.
Frequently Asked Questions
What materials do I need to make this faux ice cream cookie sandwich?
You’ll need air dry foam clay, silicone molds, and decorative elements like craft sprinkles and fine glitter to complete the look.
How do I create a dark chocolate color with air dry foam clay?
To create a realistic dark chocolate color, mix a small amount of brown air dry foam clay with a tiny piece of black clay. Knead the colors together until you achieve a rich, dark brown shade. Start with a small amount of black and gradually add more if needed to avoid making the color too dark.
Why does my glue drip look messy or uneven?
If your drip looks uneven or clumpy, it’s usually because too much glue is being applied at once or it’s not hot enough. Use a hot glue gun on a steady, controlled setting and apply the glue slowly in small sections. Let gravity create the drip naturally instead of forcing it, and vary the length of each drip for a more realistic chocolate effect. You can easily remove the glue webs once it is dry.
How long does air dry foam clay take to dry?
Most air dry foam clay projects dry within 24–48 hours depending on thickness and humidity. Let your piece fully dry before handling to avoid dents or shifting decorations.
📌 Save This Craft For Later
Pin this cute faux ice cream craft so you can make it later! 👇