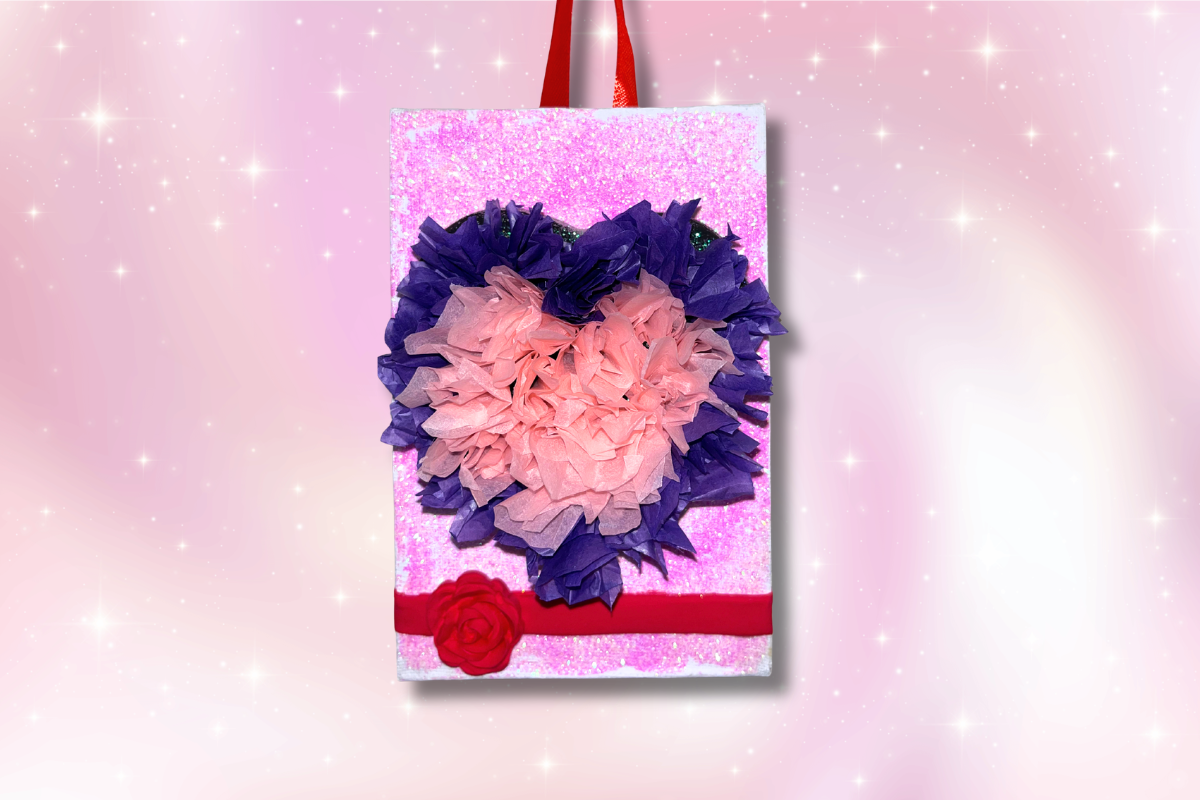
DIY Valentine Heart Wall Art (Air Dry Foam Clay & Tissue Paper Craft)
Watch the full DIY Valentine heart wall art tutorial above, then follow the step-by-step instructions below to create your own textured canvas decor using air dry foam clay and tissue paper.
If you’re looking for an easy and beginner-friendly DIY Valentine craft, this heart wall art is a beautiful and creative option. Using air dry foam clay and tissue paper, you can create a textured, layered design that looks polished and decorative.
This DIY heart wall art is perfect for Valentine’s Day decor, nursery styling, or handmade gifts. It’s lightweight, customizable, and uses affordable materials that are easy to find.
If you enjoy projects like this, check out DIY ResinCrete Flower Ornaments Tutorial for additional inspiration. You may also love this DIY Fake Bake Tutorial for Cupcakes!
Why you’ll love this DIY:
- No heat or curing required — just shape, design, and let it air dry
- Lightweight and easy to hang
- Customizable colors and textures
- Budget-friendly materials
- Perfect beginner-friendly craft
This post may contain affiliate links. If you purchase products through these links, I may earn a small commission at no extra cost to you.
Supplies Used In This Craft:
- Air Dry Foam Clay
- Heart Cookie Cutters
- Craft Glitter
- Tissue Paper
- Small Canvas Board
- Rose Flower Mold
- Ribbon
- Clear Glue
- Hot Glue Gun
How to Make DIY Valentine Heart Wall Art
- Prepare your workspace and gather all supplies before starting your DIY wall art project.
- Cut or tear small pieces of tissue paper and set them aside for layering.
- Roll out your air dry foam clay to about ¼ inch thick to create a sturdy base.
- Use a heart cookie cutter to cut out your main heart shape.
- Apply a layer of clear glue or school glue to your canvas board, then add a few small drops of super glue in the center for extra hold.
- Press your cut heart firmly into the center of the board to secure it in place.
- Add a smaller heart imprint inside the clay heart to act as a guide for your textured design.
- Sprinkle craft glitter over any areas where glue is still wet, include the outer edges of the heart.
- Brush a thin, even layer of glue over the center section of the clay heart.
- Press your tissue paper pieces into the clay using a tool or brush handle to create a layered, textured effect.
- Trim any excess tissue paper to keep the edges clean and defined.
- Add optional embellishments or molded details using your rose mold or extra clay for dimension.
- Allow the piece to dry completely for 24–48 hours before handling.
- Attach ribbon to the back using a hot glue gun for easy hanging.
Product Highlights From This Video

Air Dry Foam Clay
Soft, lightweight clay perfect for textured wall art.

Tissue Paper
Creates beautiful layered texture and color.

Canvas Board
Provides a sturdy base for your wall art.
Frequently Asked Questions
What is the best material for DIY heart wall art like this?
For this project, air dry foam clay works best because it’s lightweight, easy to shape, and holds texture well when adding tissue paper details.
How do you create the textured look on the heart?
The texture comes from pressing small pieces of tissue paper into the clay using a tool or brush handle. This creates a layered, dimensional effect that looks soft and decorative.
Can I use regular air dry clay instead of foam clay?
Yes, but traditional air dry clay is heavier and less flexible. Foam clay is easier to work with for this type of textured wall art and is better for lightweight hanging pieces.
How do I attach the heart to the canvas securely?
Use a strong layer of clear glue to attach the clay to your canvas board. Press firmly and allow it to dry completely.
How long does this DIY wall art take to dry?
Dry time is typically 24–48 hours depending on how thick your clay is and the humidity in your space. Make sure it is fully dry before hanging or displaying.
How can I hang or display this finished piece?
You can attach a loop of ribbon to the back using a hot glue gun, or display it on a small easel for tabletop decor.
📌 Save This Craft For Later
Pin this DIY project so you can make it later!👇